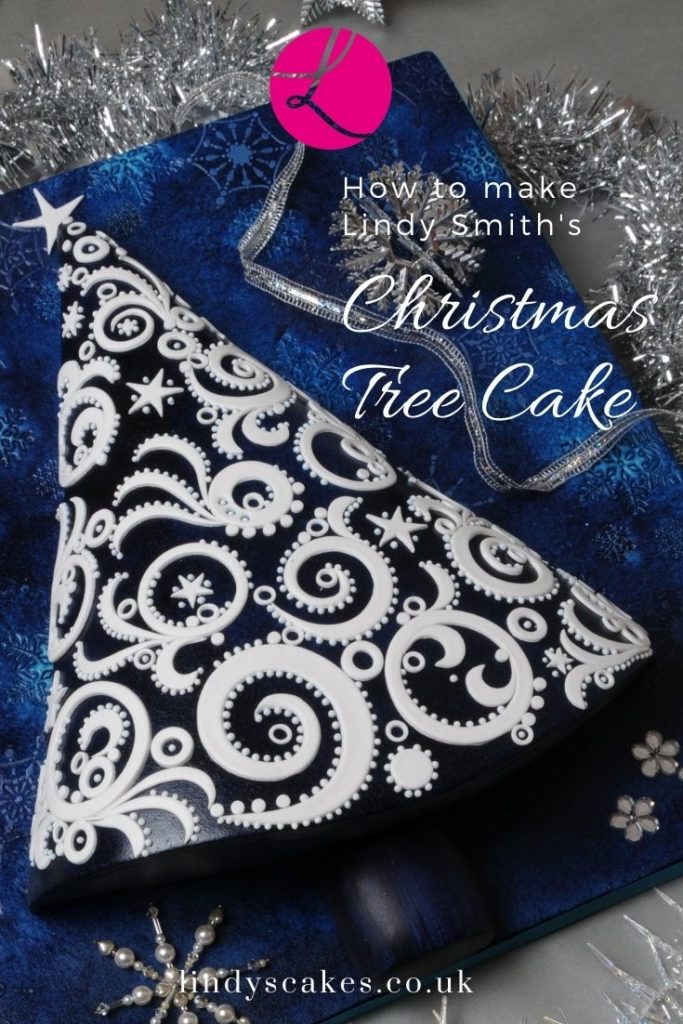
I was recently asked to contribute the Christmas cover cake design for a new Dutch cake magazine – Mjam Taart! My resulting Christmas tree cake is now in print and on the cover. Hoping you like it…
Christmas tree cake
I was really pleased with the cake itself, which is decorated using the Patchwork cutters swirl cutter set and my curled leaf set together with piped dots of royal icing – not difficult! The board was embossed with patchwork cutter snowflakes, stippled with blue paste colour and then stencilled with jewelled snowflake stencils using blue royal icing.
Instructions to cake this Christmas tree cake
It’s been quite a few years since I wrote this article for the Dutch magazine. So I thought it time to share my instructions in English with you
ADVERTISEMENT
Covering the cake board
- Roll out 1.4kg of the blue sugarpaste, ideally between spacers. TIP: Rolling out the sugarpaste onto a surface smeared with white fat rather than icing sugar will ensure that there are no unwanted white marks on the paste.
- Lift up the paste, using a rolling pin for support, and place it over the board.
- Take a smoother and using a circular motion, smooth the paste to give a level surface. Using a pallet knife, trim the edges flush with the sides of the board, taking care to keep the cut vertical.
- Make a tree template from greaseproof/baking paper and place onto the covered board to allow sufficient space for both the trunk and the star on top of the tree and scribe around and outside of the template using a scriber or glass headed pin.
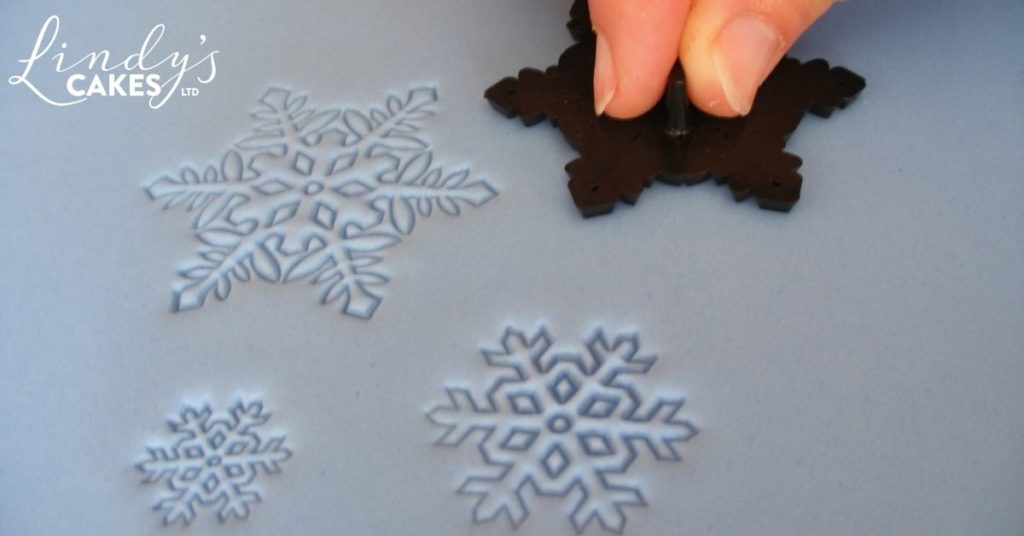
- Take one of the snowflake embossers and press it gently into the soft sugarpaste, repeat using the different sizes of snowflake to create a background snow scene as shown. Tip: leave enough room between the snowflakes to allow the stencilled snowflakes to be added later.
- Place to one side to dry.
Painting the cake board
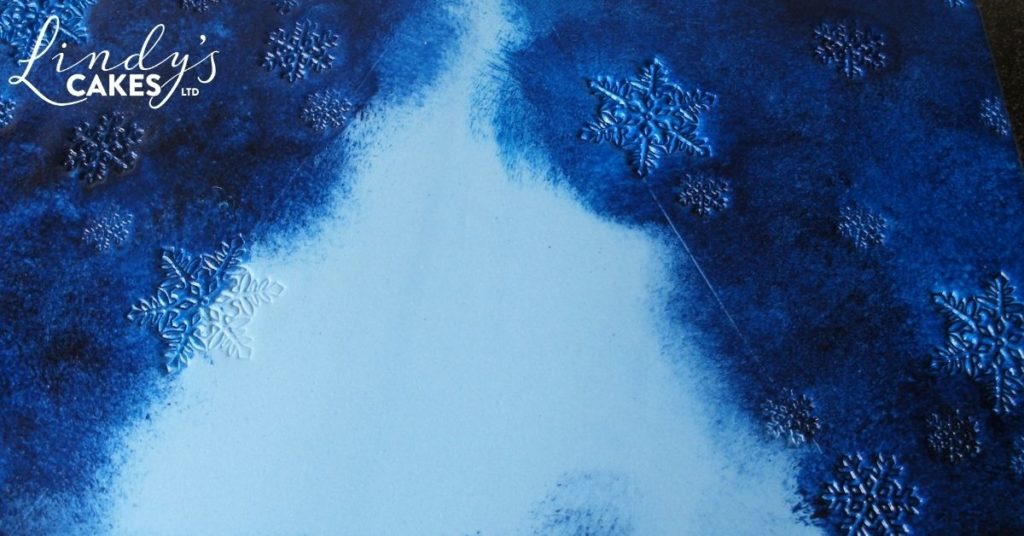
- Separately dilute the two blue paste colours with clear spirit or boiled water. Paint over one of the snowflakes, allowing the diluted paste colour to fill the indented snowflake shape.
- Take a dry large stippling and stipple over and around the snowflake, as shown in the step, to spread the colour.
- Continue painting the snowflakes varying the colour used and depth of colour as you go. There is no need to paint over the area where the cake will rest.
- Place to one side to dry
Stencilling the snowflakes
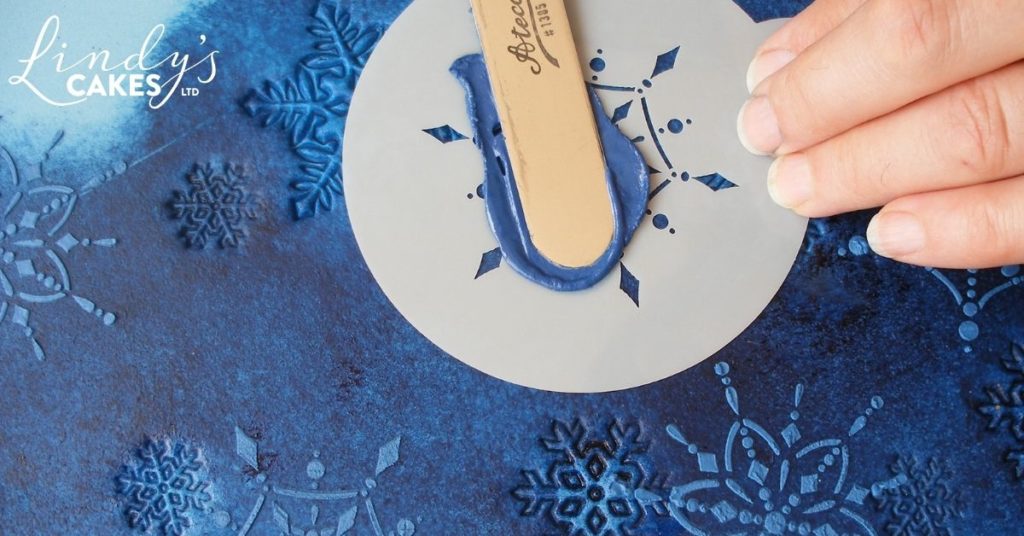
- Colour a little royal icing blue then adjust the consistency to make a reasonably firm icing by adding a little icing sugar or boiled water as appropriate.
- Place a snowflake stencil onto a space between the embossed snowflakes. Pick up some blue royal icing with a pallet knife then carefully spread the icing across to top of the stencil, holding the stencil in position with your other hand. TIP: experiment and practice on a piece of spare sugarpaste first, then you’ll know how thickly you wish to apply the icing.
- Once the icing is an even thickness, remove the stencil, taking care not to smudge the pattern.
- Wash and dry the stencil then repeat as desired.
Carving the cake
- Remove the crust from the cake and split and fill the cake with jam, buttercream or chocolate ganache, if desired. Level the cake.
- Cut your tree template in half down the middle. Place the halves on top of the cake, so that they fit, note, the tip of the tree template will not fit onto the cake at this stage. With a sharp knife, cut vertically through the cake around both templates. Remove the templates and excess cake.
- Stick the two halves of the tree together using jam, buttercream or chocolate ganache. Add a small piece of cake to the top of the tree to create the tip and cut to shape.
- Shape the tree by slicing up from the tip of the tree to the lower edge, the widest section of cake.
- Next, curve the side edges to give a more rounded appearance to the tree. Tip, if you’ve not carved a cake before do this slowly removing a little cake at a time, you are aiming for a nice smooth finish with no obvious knife cuts!
Covering the cake
- Place the cake on waxed paper and spread buttercream or chocolate ganache over the underside of the tree. Roll out some blue sugarpaste and cut one edge straight. Cover the base of the tree by placing the straight edge against the base of the cake, smooth and cut the paste flush with the top of the cake, using a pallet knife.
- Spread a thin layer of buttercream or chocolate ganache over the top of the cake. Roll out the remaining blue sugarpaste into a triangular shape and place over the cake.
- Smooth to shape, using a smoother and the heat from your hand. Next, take the smoother and place it against one side of the cake and run it along the side of the tree pressing down into the excess paste at the same time to create a cutting line in the sugarpaste. Repeat for the second side.
- Next cut the paste flush with the underside of the tree using a pallet knife and a smoother as demonstrated.
- Place to one side to dry.
Painting the cake
- Dilute the dark blue paste colour with clear spirit or boiled water. Then using a stippling brush, stipple the cake with the diluted paste colour.
- Once this has dried, stipple over the cake with confectioners glaze to seal in the colour.
- Place to one side to dry.
Assembling the cake
- Transfer the cake to the covered board, being careful to place the tree so there is enough room for the trunk and star.
- To make the trunk, take some of the off cuts of sugarpaste and roll them into a cylinder and place in position. Tip, use a smoother to help roll the paste, you will get a more uniform finish.
- Paint over the trunk with diluted blue paste colour using sweeping strokes and a large brush.
Decorating the Christmas tree cake
- Thinly roll out some white modelling pastes between narrow spacers.
- To create the scrolls, take one of the scroll cutters and press it firmly onto the rolled out paste. Then, to ensure the edges of the shape are cut cleanly take a craft knife and cut around the indented lines. Repeat, then remove the excess paste, leaving the shape in position on your work board to firm up slightly.
- Cut curled leaf shapes using the three curled leaf cutters, using both sides of the cutters. Tip, press the cutting edges of the cutters through the paste and give them a little wiggle to make sure the cut is clean, then remove the paste from the cutter with a soft paintbrush. Leave the shapes to firm up slightly
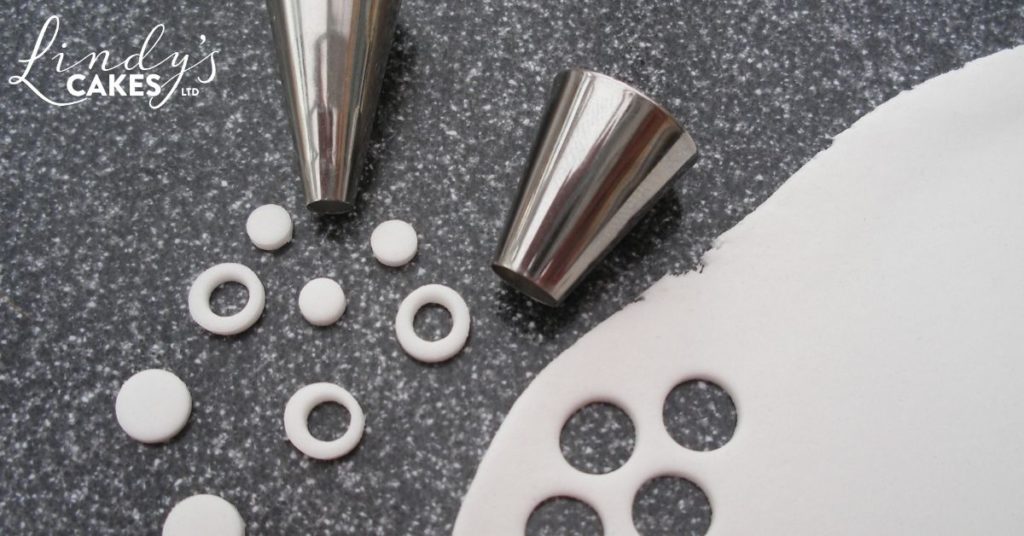
- Cut circles using the suggested circle cutters and piping tubes, removing the centres of the larger circles to create paste rings.
- Finally cut out a selection of small stars.
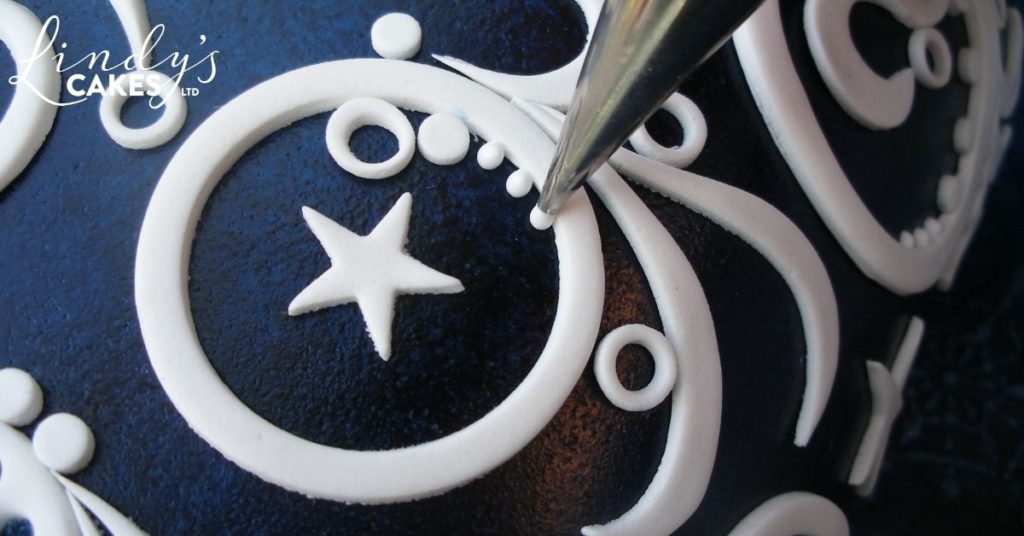
- Once you have a collection of different shapes attach them to the cake with sugar glue, using the photos as a guide.
Adding Royal Iced detail
- To pipe the dots, add a little superwhite dust to the royal icing to make a true white colour. Check the consistency of the icing and adjust as necessary, by adding more sugar or boiled water, you need to be able to pipe round dots not pointed cones.
- Place the coupler into the reusable piping bag, fit the No 2 tube and half fill with royal icing. Then use to pipe dots as required around the shapes and patterns on the cake, see the finished cake for reference. TIP: if some of your dots are slightly pointed, quickly knock the point back into the dot with a damp brush before the icing sets.
Finishing touches
Using the non-toxic glue stick attaché the ribbon to the outside edges of the cake board.
Hope you like it!
If you speak Dutch these instructions plus all the step by step photos are in the magazine – enjoy!
Lindy
‘Bringing world-class sugarcraft into your kitchen’
