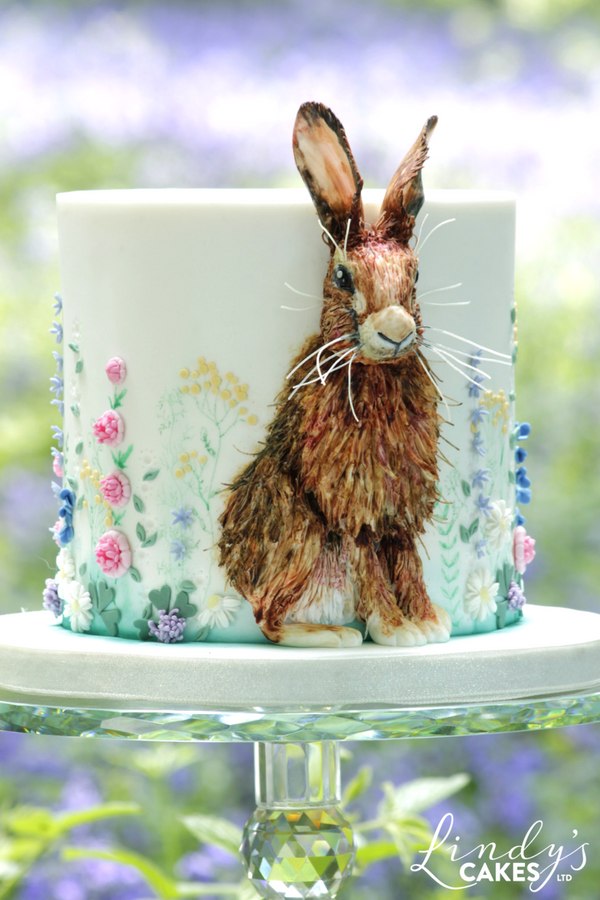
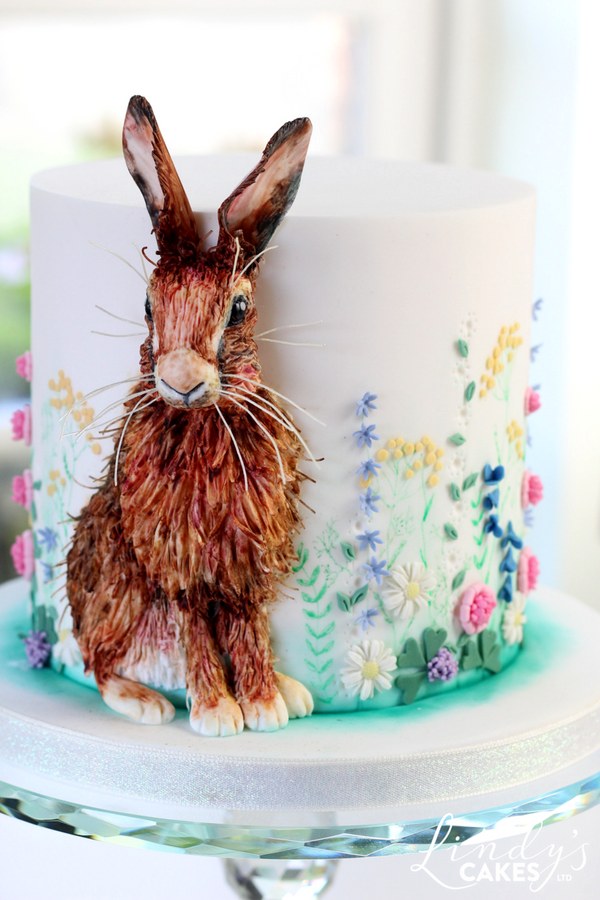
Harry the Hare in his edible wildflower meadow is a cake design that I am immensely pleased with. My original idea was to create an Easter bunny amongst grass searching for decorated Easter eggs. However, the timing wasn’t quite right. My cake was being published in a magazine just days before Easter and so I was asked to change the design to a springtime cake rather than an Easter cake. Harry in his edible wildflower meadow was the result.
Designing Harry the Hare Cake
I am currently living on top of a hill in rural south Shropshire where I’m very privileged to see hares on a fairly regular basis. Either out walking my dog in the fields or in my car on narrow country lanes framed with colourful wildflowers. It is very special living here, it’s not like anywhere else I’ve ever lived and I felt drawn to record what I see around me in cake.
ADVERTISEMENT
Instructions to make Harry
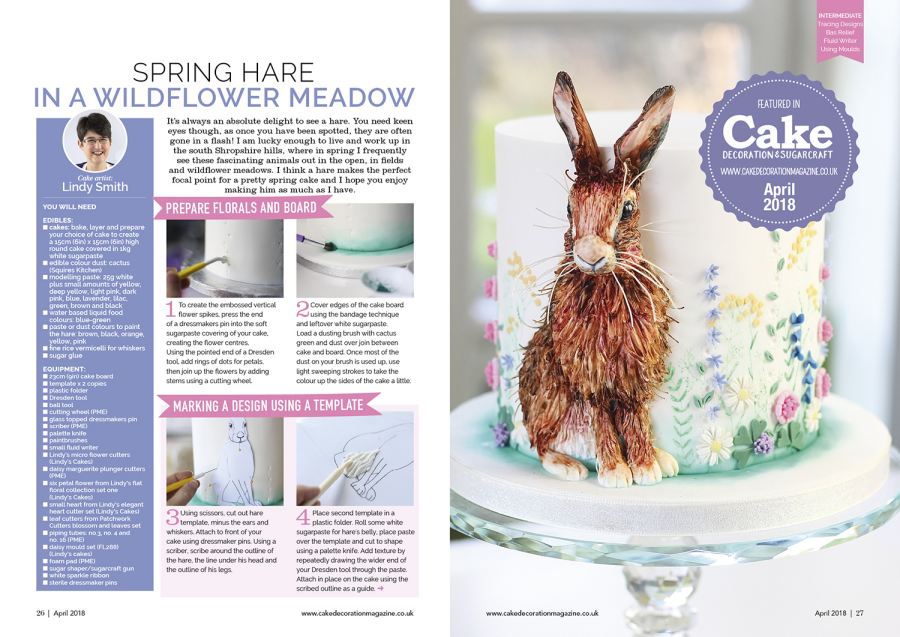
Harry, as he is now known, appears as the spring hare cake in the April 2018 edition of Cake Decoration and Sugarcraft. If you’d like instructions to make your own version of Harry downloadable instructions are available from the publishers.
Instructions to make the wildflower meadow
As often happens when writing instructions that are going to be printed, I found that I didn’t really have enough room to show as much detail as I would have liked. To redress this, I recorded a Facebook live tutorial shortly after my spring hare cake was published. I hope it helps you make your own edible wildflower meadow.
You will need
Materials:
- Modelling paste: small amounts of white, yellow, deep yellow, light pink, dark pink, blue, lavender, lilac, green, brown, black
- Dresden tool
- Ball tool
- Paintbrushes
- Small fluid writer
- Cutters:
- Lindy’s micro flower cutters (Lindy’s Cakes)
- Daisy marguerite plunger cutters (PME)
- six petal flower from Lindy’s flat floral collection set one (Lindy’s Cakes)
- small heart from Lindy’s elegant heart cutter set (Lindy’s Cakes)
- leaf cutters from Patchwork Cutter’s blossom and leaves set
- Piping tubes: No 3, No 4 and No 16 (PME)
- Daisy mould set (FL288) available from Lindy’s cakes
- Foam pad (PME)
- Sugar shaper/ sugarcraft gun
The Facebook Live Tutorial
Here are the additional tutorial links I mentioned in the video:
Fluid writer tutorial – ‘Doodling, Facebook Live and the Curious Cake Decorator’
Sugar shaper tutorial – ‘How to use a sugar shaper’
The edible wildflower meadow – a quick summary
You’ll need to watch the tutorial to see all the flowers and leaves being made but here is a summary of some of what I’ve covered.
The daisies
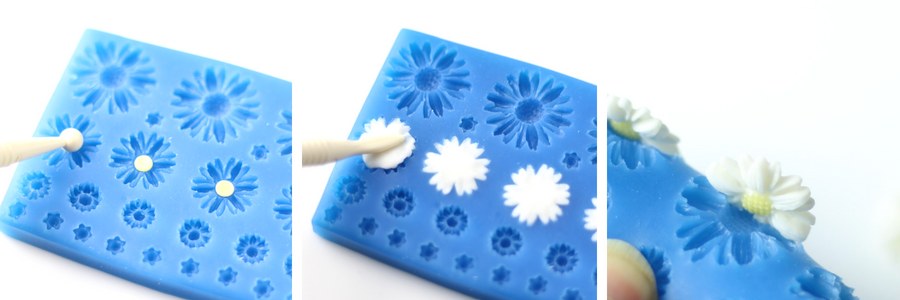
- Using the daisy mould, add small balls of yellow modelling paste to the centre of each medium-sized daisy. Press into place with a ball tool making sure there is no excess paste.
- Fill the cavity with white modelling paste using a dresden tool to encourage the paste into the recesses of the petals.
- Once complete, flex the mould and release the daisies.
The smallest flowers
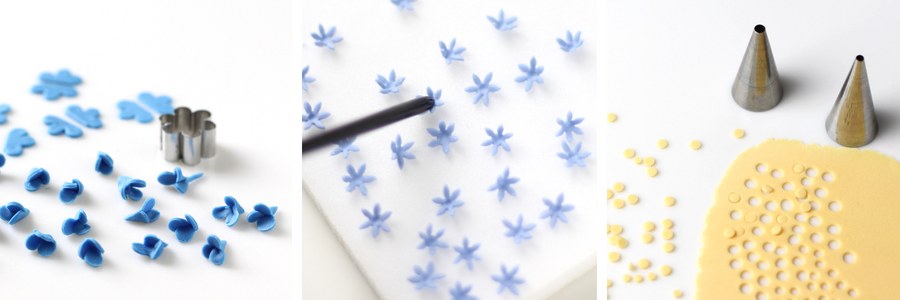
- Using the 6-petal flat floral cutter cut out a selection of blossoms from blue modelling paste. Cut each blossom in half using a craft knife. Pick up each half blossom in turn and roll to form a 3-petal flower, as shown.
- Thinly roll out the lilac modelling paste and using the 6-petal micro flower cutter cut out a selection of blossoms. Use a paintbrush to help release the flowers from the cutter if necessary. Place on a foam pad and cup using the end of a paintbrush.
- Thinly roll out the yellow modelling paste and cut out circles using the piping tubes. Using sugar glue on the tip of a paintbrush, attach these circles to form clusters of flowers on the drawn stems as shown on the finished cake.
Striking two-tone pink flowers
These particular flowers are my favourites, hope you like them too.
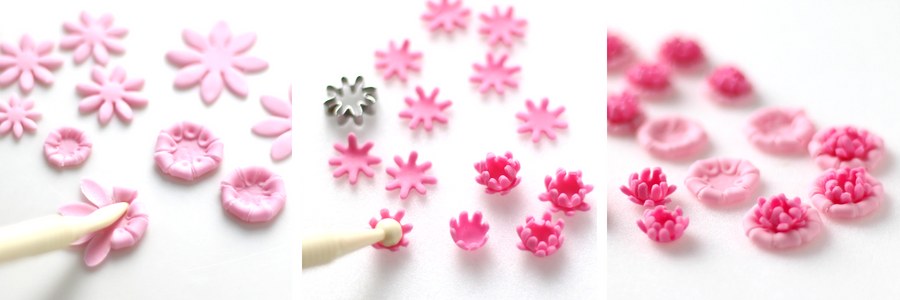
- Stamp out a selection of daisy shapes using the daisy marguerite plunger cutters and light pink modelling paste. Turn each flower over and fold every petal in half into the centre as shown, pressing on the petal tips with a dresden tool to secure.
- Thinly roll out the dark pink modelling paste, using the 8-petal micro flower cutter, cut out a selection of blossoms. Use a paintbrush to help release them from the cutter if necessary. Place on a foam pad and cup using a small ball tool as shown.
- Take one cupped flower and stick it inside another to create a double blossom. Next, attach one to the centre of each folded light pink flower.
Harry as he appeared in print
“Creativity is a combination of discipline and childlike spirit” Robert Greene
I have loved creating Harry and I hope he inspires you to get creative too. Remember you can download the magazine with the step-by-step instructions direct from the publishers.
Sweet wishes
Lindy
‘Bringing world-class sugarcraft into your kitchen’
DORIS SWANSSON says
Hi Lindy
I have most of your books and love your work. I love the simplistic way you have done the flowers for this one. They look amazing and of course Harry looks adorable.
Regards Doris
Lindy Smith says
Thank you Doris, so pleased to hear you love my work.